The Simple Origami Box
Welcome to the second origami tutorial!
On the menu today is another simple model, suitable for beginners: it is the simple square box. It is indeed possible to fold a lid for this box, and although this tutorial with not be dealing with it directly – only the base – it is easy to explain. You can even fold a divider for this box and divide it into smaller compartments.
But let’s get started. To fold this model, you will need a single square of paper.
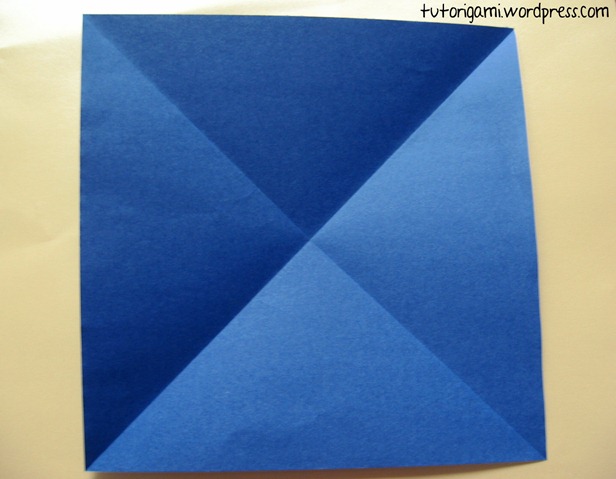
Fold the square diagonally. Unfold.
Fold in the other diagonal and unfold.
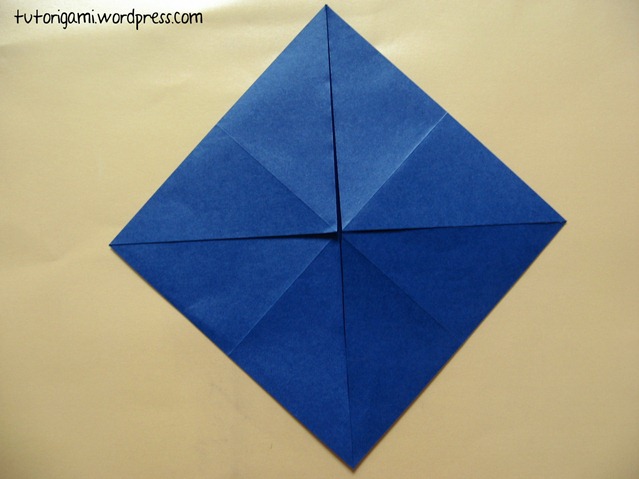
Fold the square both horizontally and vertically and unfold. The fold lines on your square should now look like the picture above.
Start folding the corners in to meet the centre point. Do it as shown above – fold opposite corners first. This prevents you from going crooked.
Fold in the rest of the corners. This is known as a blintz fold.
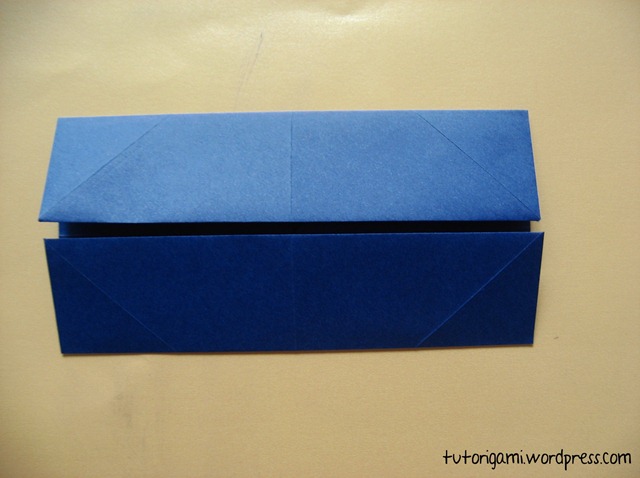
Keep one of your fingers on the centre point and all four flaps. This is to prevent anything slipping. Now fold up the bottom of the middle up, to lie on the centre line. It will look like the picture below when you are done.
Repeat for the top of the model.
Now unfold the previous two steps again.
Repeat for the left side…
… and the right.
Unfold again.
Start pulling out the left and right flaps…
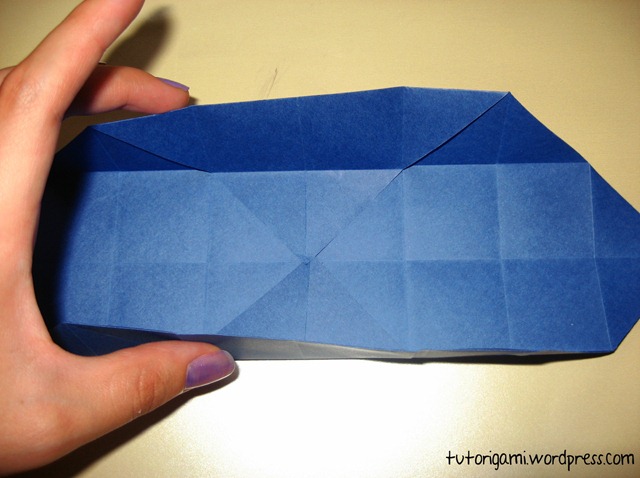
… until it looks like this. Note the small square of lines in the middle. This will become the base of your box.
Fold the top and bottom of the model upwards by 90 degrees. Hold them like that with your one hand.
While holding it, start folding the right hand side flap upwards as well. Note the two little triangle-shaped flaps that move inwards on their own as you fold.
Here is a view from the side to show what is happening to the flaps.
Repeat the folding upwards on the left. If you now let go of your box, it should look like the picture above. Note the shape.
Take the left flap, fold it up, over, down and tuck in the small triangle flap. Wait, let’s try that again slowly with the right hand side. ![]()
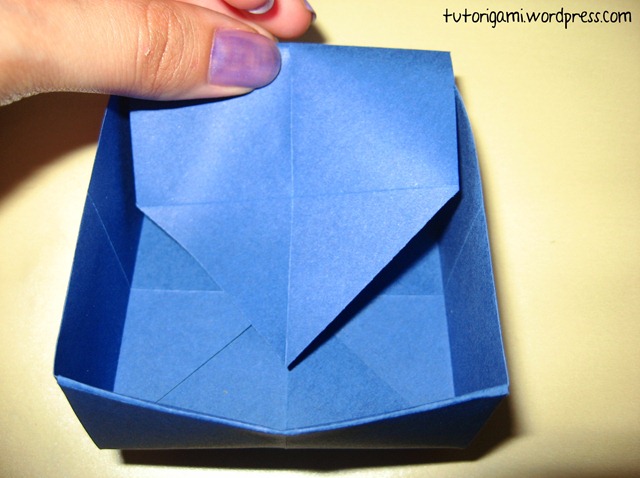
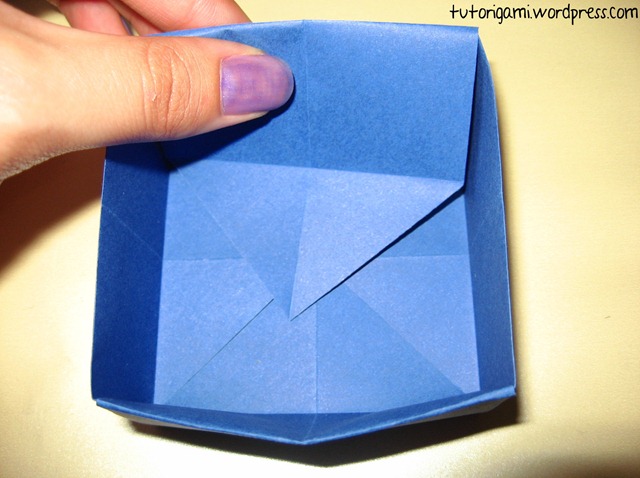
It was 90 degrees upwards. Now take it and start folding it down towards the base again. It goes over the sides of the box, which are now formed by the two triangle-shaped pieces that started moving in on their own, when you started lifting the sides.
Like this.
Almost there. The small triangle flap at the tip will fit itself into its space. Once you have all the sides in position, shape the square box and sharpen the creases of the sides, if necessary.
Well done! You have finished an origami box! If you like, you can add a drop of glue or a piece of clear tape in the very centre, to keep all four triangle flaps down.
If you want a lid… There are several ways to get one that fits the base exactly, but the easiest way would be to simply take a bigger piece of paper than that what you used for the base. A piece of paper that is a half-centimetre bigger on each side than the base-paper usually works well, but you may have to experiment, depending on the thickness of your paper. That is, if your base-paper was 20x20cm, a 21x21cm paper should make a nice lid.
It is also possible to fold a divider that you can fit inside this box to divide it into smaller compartments. I must say it makes a great storage for earrings or rings! If you head over to wikiHow, you can read the tutorial that I wrote on it there. However, this divider is not a beginner’s project anymore. It goes into the range of intermediate to advanced.

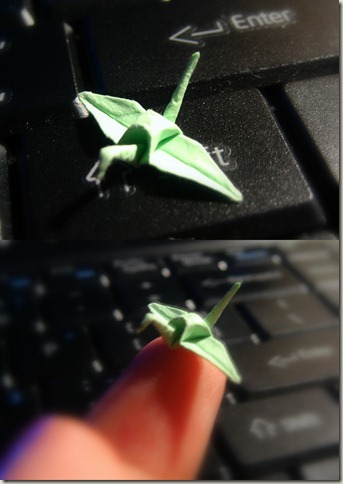
In other news, in my previous post on the origami crane, I was challenged by a commenter to reveal my smallest origami crane. So, here is the little guy:
It sits on my fingertip. I folded it from a 2x2cm (that’s less than an inch) piece of paper with some help from the tweezers. Generally it lives in a little glass jar on my shelf. It used to sit on my desk, but I have nearly squashed it several times with cups of tea. So then it moved to the jar for safety.
Sorry that the picture is not quite sharp, but my camera was struggling to focus on something so small! ![]()
Any questions? Ask away in the comments! For my next tutorial, I am planning some valentine origami. Happy folding!
Origami love,
Elana. ![]()












I’ve made these boxes before and they’re beautiful. Your tutorial is super fun and easy to follow. I’m going to share this with my FB friends… Looking forward to seeing your Valentine origami too!:)
Well, thanks!
Yes, please feel free to share this page with your friends! 🙂
Valentine Origami? *raises an eyebrow* Hmm. Okay. I’m intrigued. 😀 (Or amused, I can’t really tell the two apart these days.) 😀
Just tried this tutorial today–and I actually managed to get it RIGHT! *preens* Considering I fail at making anything that requires using my hands (Shuddup! I don’t know how else to put it! 😉 it’s kind of a feat! The pictures are a great help! 😛
*makes an Impish exit*
Also…”awaiting moderation”….*gasp*
Don’t you trust me not to spam you? 😉
…don’t answer that. O.o
It was your first comment on the site. It is automatically held for moderation by WP.
You should be automatically approved from now on. 😉
😆
For those people who, unlike us, have romantic relations. I know it’s hard to fathom! 😉
YAY! I knew I’d finally be able to infect you! 😀 *cough cough* Or perhaps… entice you to try it yourself…? 😉 I’m glad it’s that easy to follow!
😀
“YAY! I knew I’d finally be able to infect you! *cough cough* Or perhaps… entice you to try it yourself…? ”
I would have tried it sooner…but I kept thinking to myself “Girl! You really can’t afford another hobby. You have little enough time and money as is…” …and then, you know, I got all excited and fan-ish and…
Well, you know where that leads by this time! 😉
*facepalms self*
“It was your first comment on the site. It is automatically held for moderation by WP. You should be automatically approved from now on.”
I should think so! *indignant huff* 😛
Origami is actually one of the most economical and versatile hobbies you can have! 😉
Yep, automatically approved this time! 😉
Valentine Origami is a very great idea! I get already your posts from Cartoons & Creative Writing. You are not only a wonderful writer and Cartoonist but also it seems that you don’t have a scarecity of ideas. I am curious about Valentine Origami 🙂
I’m glad you think so! 🙂
Awww thanks! 😀 You’ll make me blush!
I have a question here.
To fold the divider, how big should the paper be?
Thanks for the great tutorial!
~* Eli *~
The same size as you used to fold the base of the box from. 🙂
It’s my pleasure! 😀
Is there a way to make the lid shorter, so that it looks like an actual lid rather than just a slightly bigger box upside down on top of the first?
Yes, it’s possible… with a lot of maths and measuring. You’d need a paper smaller than the one for the base, and then measure the size of the base and calculate… 😉
It’s called the simple box, because that it is exactly what it is: simple and not meant for stuff like this.
But there are other, more complicated models that indeed have “real” lids. 🙂